 by
by Windows 11 is Microsoft’s latest operating system, and it comes with a number of new features and improvements. One of the most notable changes is the inclusion of Windows Hello, which allows you to log in with your face or fingerprint. However, in order to use Windows Hello, you need a TPM (Trusted Platform Module) chip.
If your PC doesn’t have a TPM chip, you can still install Windows 11, but you won’t be able to use Windows Hello.
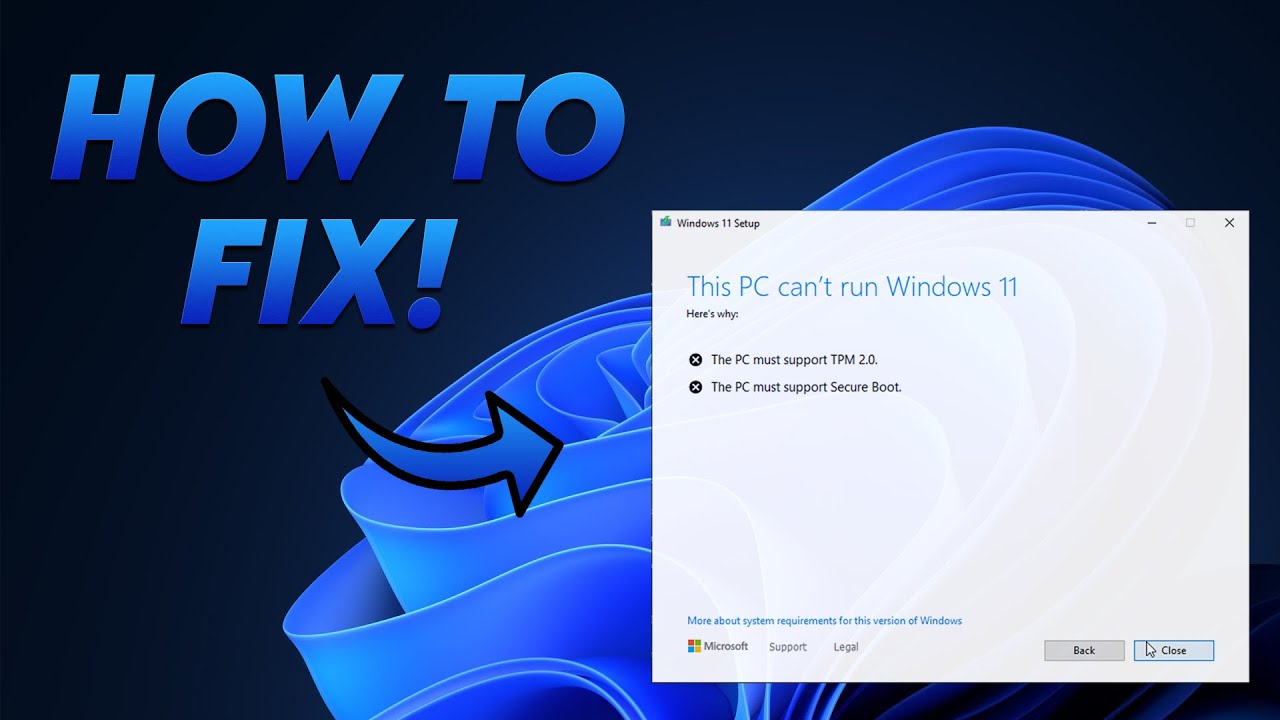
As you know, TPM is a hardware-based security measure that helps protect your computer from malicious software attacks. In order to install Windows 11 without TPM, you’ll need to follow these steps:
1. Boot into the BIOS and disable TPM. This can usually be done by going into the Security tab and finding the TPM option. Once you’ve disabled it, save your changes and exit the BIOS.
2. Now, boot into Windows 10 and open up an elevated Command Prompt window. To do this, simply search for “Command Prompt” in the Start menu, right-click on it, and select “Run as administrator.”
3. In the Command Prompt window, type in the following command and press Enter: bcdedit /set {current} tpm owneroff
4. Close the Command Prompt window and reboot your computer. When it boots back up, Windows 11 will now be installed without TPM!
Install Windows 11 on Unsupported Hardware
As we all know, Microsoft has released Windows 11, and while most of us are scrambling to update our systems, there are some of us with older hardware that can’t support the new operating system. Here’s a guide on how to install Windows 11 on unsupported hardware.
First things first, you’ll need to check if your hardware is actually compatible with Windows 11.
The list of supported hardware for Windows 11 can be found here. If your hardware isn’t on the list, then unfortunately you won’t be able to install Windows 11.
If your hardware is compatible with Windows 11, then the next thing you need to do is create a bootable USB drive or DVD.
You can find instructions on how to do this here. Once you have created your bootable media, insert it into your computer and reboot.
Your computer should now boot from the USB drive or DVD and you will be presented with the “Windows Setup” screen.
From here, simply follow the prompts to install Windows 11 onto your computer. Once the installation is complete, you will be able to enjoy all the new features and improvements that come with Windows 11!
Credit: www.addictivetips.com
How Do I Install Windows 11 Without Tpm And Secure Boot?
If you’re looking to install Windows 11 without TPM and Secure Boot, there are a few things you’ll need to do. First, you’ll need to create a bootable USB drive or DVD with the Windows 11 installation files on it. Once you have that, you’ll need to disable TPM and Secure Boot in your BIOS settings.
With those two things disabled, you should be able to boot from your USB drive or DVD and install Windows 11 without any issues.
How Do I Install Windows 11 Without Tpm Tpm 2.0 Bypass?
If you’re looking to install Windows 11 without TPM, there are a few different ways to bypass it. One way is to use an older version of Windows that doesn’t require TPM 2.0. Another way is to disable TPM in your BIOS or UEFI settings.
And finally, you can also just install Windows 11 without TPM altogether. Let’s take a look at each of these methods in more detail. If you’re using an older version of Windows, you can simply bypass the TPM requirement by following these steps:
1) Download the ISO for the older version of Windows from Microsoft’s website.
2) Burn the ISO to a USB drive or DVD.
3) Boot from the USB drive or DVD and follow the prompts to install the older version of Windows.
4) Once installed, open up the Control Panel and go to “Security.” 5) Click on “TPM Security” and then select “No action required.” This will bypass the TPM requirement altogether.
Alternatively, if you’re using a newer version of Windows that requires TPM 2.0, you can disable it in your BIOS or UEFI settings before proceeding with installation. To do this, simply reboot your computer and enter into your BIOS or UEFI settings ( typically accessed by pressing F2 or DEL during boot). Once inside, look for an option named something like “Security,” “TPM,” “Trusted Platform Module,” or something similar and set it to Disabled .
Save your changes and exit BIOS/UEFI , then proceed with installing Windows as usual . Keep in mind that if you have BitLocker enabled , disabling TPM will cause it to automatically suspend protection . So , if possible , backup any data encrypted with BitLocker before proceeding .
How to Install Windows 11 on Unsupported CPU & TPM 1.2
Conclusion
Windows 11 is out and many people are wondering how to install it without TPM. TPM is a security feature that allows you to encrypt your data and keep it safe from hackers. However, it can be a pain to set up and use, so many people choose to skip it altogether.
If you’re one of those people, here’s how to install Windows 11 without Tpm:
1) Download the Windows 11 ISO from Microsoft’s website.
2) Burn the ISO to a USB drive or DVD.
3) Boot your computer from the USB drive or DVD.
4) Choose the “Custom” installation option.
5) When asked, do not select “Configure TPM.” just click “Next.”
6) Finish the installation and enjoy your new copy of Windows 11!